Getting Started
- 1. Create an App
- 2. Set Up the SDK
- 3. Verify Installation
- 4. Review Configuration Options
- Troubleshoot
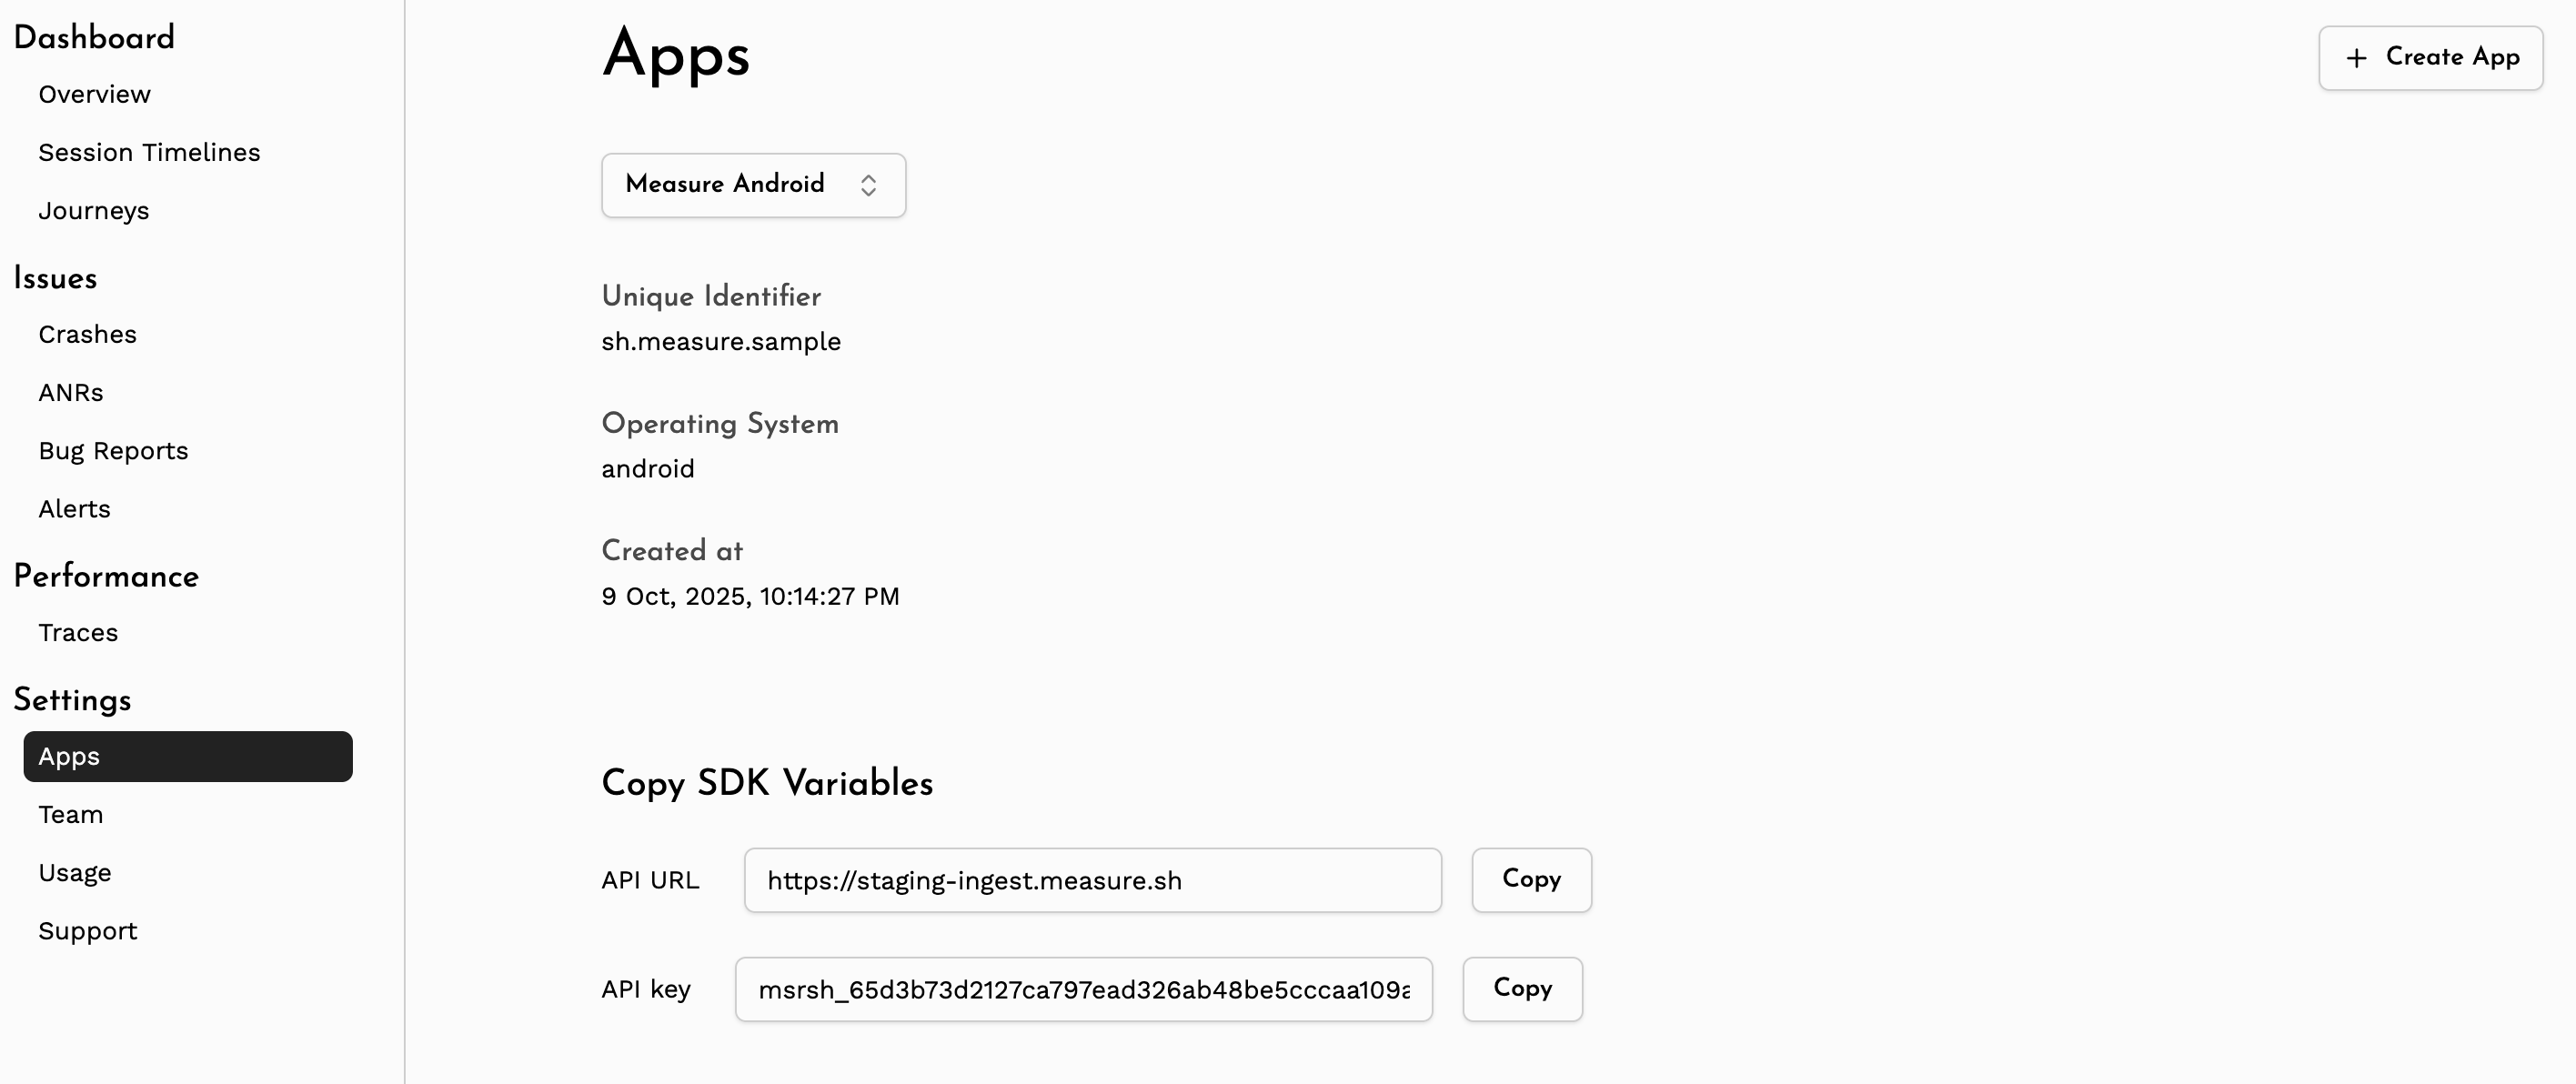
1. Create an App#
Create a new app by visiting the Apps section on the dashboard.
Once the app is created, note the API URL & API Key for your app. This will be used in the SDK configuration
in later steps.
2. Set Up the SDK#
Android#
Minimum Requirements
| Name | Version |
|---|---|
| Android Gradle Plugin | 8.1.0 |
| Min SDK | 21 (Lollipop) |
| Target SDK | 35 |
Self-host Compatibility
| SDK Version | Minimum Required Self-host Version |
|---|---|
>= 0.16.0 | 0.10.0 |
0.13.0 -0.15.1 | 0.9.0 |
0.10.0 - 0.12.0 | 0.6.0 |
0.9.0 | 0.5.0 |
Add the API Key & API URL#
Add the API URL & API Key to your application's AndroidManifest.xml file.
<application>
    <meta-data android:name="sh.measure.android.API_KEY" android:value="YOUR_API_KEY"/>
    <meta-data android:name="sh.measure.android.API_URL" android:value="YOUR_API_URL"/>
</application>
Configure API Keys for Different Build Types
You can use manifestPlaceholders to configure different values for different build types or flavors.
In the build.gradle.kts file:
android {
    buildTypes {
        debug {
            manifestPlaceholders["measureApiKey"] = "YOUR_API_KEY"
            manifestPlaceholders["measureApiUrl"] = "YOUR_API_URL"
        }
        release {
            manifestPlaceholders["measureApiKey"] = "YOUR_API_KEY"
            manifestPlaceholders["measureApiUrl"] = "YOUR_API_URL"
        }
    }
}
or in the build.gradle file:
android {
    buildTypes {
        debug {
            manifestPlaceholders = ["measureApiKey": "YOUR_API_KEY"]
            manifestPlaceholders = ["measureApiUrl": "YOUR_API_URL"]
        }
        release {
            manifestPlaceholders = ["measureApiKey": "YOUR_API_KEY"]
            manifestPlaceholders = ["measureApiUrl": "YOUR_API_URL"]
        }
    }
}
Then add the following in the AndroidManifest.xml file:
<application>
    <meta-data android:name="sh.measure.android.API_KEY" android:value="${measureApiKey}"/>
    <meta-data android:name="sh.measure.android.API_URL" android:value="${measureApiUrl}"/>
</application>
Add the Gradle Plugin#
Add the following plugin to your project.
plugins {
    id("sh.measure.android.gradle") version "0.11.0"
}
or, use the following if you're using build.gradle.
plugins {
    id 'sh.measure.android.gradle' version '0.11.0'
}
Configure Variants
By default, the plugin is applied to all variants. To disable the plugin for specific variants, use the measure block
in your build file.
[!IMPORTANT] Setting
enabledtofalsewill disable the plugin for that variant. This prevents the plugin from collectingmapping.txtfile and other build information about the app. Features like tracking app size, de-obfuscating stack traces, etc. will not work.
For example, to disable the plugin for debug variants, add the following to your build.gradle.kts file:
measure {
    variantFilter {
        if (name.contains("debug")) {
            enabled = false
        }
    }
}
or in the build.gradle file:
measure {
    variantFilter {
        if (name.contains("debug")) {
            enabled = false
        }
    }
}
Add the SDK#
Add the following to your app's build.gradle.kts file.
implementation("sh.measure:measure-android:0.17.0")or, add the following to your app's build.gradle file.
implementation 'sh.measure:measure-android:0.17.0'Initialize the SDK#
Add the following to your app's Application class onCreate method.
[!IMPORTANT] To be able to detect early crashes and accurate launch time metrics, initialize the SDK as soon as possible in Application
onCreatemethod.
Measure.init(
    context, MeasureConfig(
        // Enable full collection in debug mode
        // to verify installation
        enableFullCollectionMode = true,
    )
)
Enable Full Collection Mode#
The init snippet above sets enableFullCollectionMode = true, which forces all data to be sent to the server
regardless of sampling. This makes it easy to verify the installation by confirming that events from your app
are reaching the dashboard.
[!IMPORTANT] Enabling full collection mode in production can lead to high costs. Disable or remove this flag for release builds and rely on sampling instead. See Configuration Options for details.
See the troubleshooting section if you face any issues.
iOS#
Minimum Requirements
| Name | Version |
|---|---|
| Xcode | 15.0+ |
| Minimum iOS Deployments | 12.0+ |
| Swift Version | 5.10+ |
Self-host Compatibility
| SDK Version | Minimum Required Self-host Version |
|---|---|
| >=0.1.0 | 0.6.0 |
| >=0.7.0 | 0.9.0 |
Install the SDK#
Measure SDK supports CocoaPods and Swift Package Manager (SPM) for installation.
Using CocoaPods
CocoaPods is a dependency manager for Cocoa projects. For usage and installation instructions,
visit their website. To integrate MeasureSDK into your Xcode project using CocoaPods, specify it in your Podfile:
pod 'measure-sh'[!NOTE]
MeasureSDK must be linked statically. If you are usinguse_frameworks!in your Podfile, you will need to ensuremeasure-shis linked statically, as dynamic linking is not supported.
CocoaPods does not natively support per-pod linkage overrides. You will need to install the cocoapods-pod-linkage plugin:
gem install cocoapods-pod-linkageThen add the plugin and linkage option to your Podfile:
plugin 'cocoapods-pod-linkage'

target 'YourApp' do
  use_frameworks!
  pod 'measure-sh', :linkage => :static
  # ... rest of your pods
end
Alternatively, if all your pods can be linked statically, you can use:
use_frameworks! :linkage => :staticUsing Swift Package Manager
The Swift Package Manager is a tool for automating the distribution of Swift code
and is integrated into the swift compiler.
Add Measure as a dependency by adding dependencies value to your Package.swift or the Package list in Xcode.
dependencies: [
    .package(url: "https://github.com/measure-sh/measure.git", branch: "ios-v0.10.2")
]
Initialize the SDK#
Add the following to your AppDelegate's application(_:didFinishLaunchingWithOptions:) to capture early crashes and
launch time metrics.
[!IMPORTANT] To detect early crashes and ensure accurate launch time metrics, initialize the SDK as soon as possible in
application(_:didFinishLaunchingWithOptions:).
import Measure

func application(_ application: UIApplication,
                 didFinishLaunchingWithOptions launchOptions: [UIApplication.LaunchOptionsKey: Any]?) -> Bool {
    let config = BaseMeasureConfig(
        // Set to true to track all sessions
        // useful to verify the installation
        enableFullCollectionMode: true
    )
    let clientInfo = ClientInfo(apiKey: "<apiKey>", apiUrl: "<apiUrl>")
    Measure.initialize(with: clientInfo, config: config)
    return true
}
#import <Measure/Measure.h>

- (BOOL)application:(UIApplication *)application didFinishLaunchingWithOptions:(NSDictionary *)launchOptions {
    ClientInfo *clientInfo = [[ClientInfo alloc] initWithApiKey:@"<apiKey>" apiUrl:@"<apiUrl>"];
    BaseMeasureConfig *config = [[BaseMeasureConfig alloc] initWithEnableLogging:YES
                                                           autoStart:YES
                                                           requestHeadersProvider:NULL
                                                           maxDiskUsageInMb:50
                                                           enableFullCollectionMode:YES
                                                           enableDiagnosticMode:NO
                                                           enableDiagnosticModeGesture:NO];
    [Measure initializeWith:clientInfo config:config];
    return YES;
  }
Enable Full Collection Mode#
The init snippet above sets enableFullCollectionMode to true, which forces all data to be sent to the
server regardless of sampling. This makes it easy to verify the installation by confirming that events from
your app are reaching the dashboard.
[!IMPORTANT] Enabling full collection mode in production can lead to high costs. Disable or remove this flag for release builds and rely on sampling instead. See Configuration Options for details.
Flutter#
The Flutter SDK currently supports only Android and iOS targets and is not available for web or desktop. The SDK depends on the native Android and iOS SDKs, so all the minimum requirements for Android and iOS apply to the Flutter SDK as well.
Minimum Requirements
| Name | Version |
|---|---|
| Flutter | 3.24 |
Self-host Compatibility
| SDK Version | Minimum Required Self-host Version |
|---|---|
>= 0.4.0 | 0.10.0 (releasing soon) |
>= 0.3.0 | 0.9.0 |
>= 0.1.0 | 0.8.0 |
Install the SDK#
Add the following dependency to your pubspec.yaml file:
dependencies:
  measure_flutter: ^0.5.0
Initialize the SDK#
To initialize the SDK, you need to call the Measure.instance.init method in your main function.
- Run app inside the callback passed to the
initmethod. This ensures that the Measure SDK can set up error handlers to track uncaught exceptions. - Wrap your app with the
MeasureWidget, this is required for gesture tracking and screenshots.
[!IMPORTANT] To detect early native crashes and to ensure accurate launch time metrics, initialize the Android SDK in
Applicationclass as described in the Android section and the iOS SDK inAppDelegateas described in the iOS section. It is highly recommended to initialize both native SDKs even when using the Flutter SDK.
Future<void> main() async {
  await Measure.instance.init(
            () =>
            runApp(
              // wrap your app with MeasureWidget
              MeasureWidget(child: MyApp()),
            ),
    // SDK configuration
    config: const MeasureConfig(
      enableLogging: true,
    ),
  );
}
This does the following:
- Initializes the Measure SDK with the provided
config. - Wraps your app with the
MeasureWidgetfor gesture detection and layout snapshots. - Sets up the error handlers to track uncaught exceptions.
Enable Full Collection Mode#
The Flutter SDK depends on the native SDKs, so enableFullCollectionMode must be set to true in both the
Android and iOS native SDK initializations (see the Android and iOS sections above). This forces all data to
be sent to the server regardless of sampling, which makes it easy to verify the installation by confirming
that events from your app are reaching the dashboard.
[!IMPORTANT] Enabling full collection mode in production can lead to high costs. Disable or remove this flag for release builds and rely on sampling instead. See Configuration Options for details.
Flutter Android Setup#
Measure Flutter SDK depends on the native Android SDK, so you need to follow all the steps mentioned in the Android section to set up the Android SDK properly.
Flutter iOS Setup#
Measure Flutter SDK depends on the native iOS SDK, so you need to follow all the steps mentioned in the iOS section to set up the iOS SDK properly.
Track navigation#
See Navigation Monitoring for instructions on how to track navigation events.
Track http requests#
See Network Monitoring for instructions on how to track HTTP requests.
Gesture tracking & Layout Snapshots#
The Flutter SDK automatically captures gestures like clicks, long clicks and scrolls. It also captures layout snapshots
on every click to help visualize user interactions. To enable these features, simply wrap your app with the
MeasureWidget as shown in the initialization step above.
Read more about adding custom widget names in the layout snapshots in Gesture Tracking & Layout Snapshots.
React Native (Coming Soon)#
The React Native SDK currently supports Android and iOS targets. It depends on the native Android and iOS SDKs, so all the minimum requirements for Android and iOS apply to the React Native SDK as well.
Minimum Requirements
| Name | Version |
|---|---|
| React Native | 0.72.0 |
| React | 18.2.0 |
Install the SDK#
Add the following dependency to your project:
npm install @measuresh/react-native@0.0.1or with yarn:
yarn add @measuresh/react-native@0.0.1Initialize the SDK#
Call Measure.init as early as possible in your app entry point — for example, inside a useEffect in your
root component or top-level App component.
import { Measure, MeasureConfig } from '@measuresh/react-native';

const measureConfig = new MeasureConfig({
  enableLogging: true,
});

await Measure.init({ config: measureConfig });
React Native Android Setup#
The React Native SDK depends on the native Android SDK, so you need to follow all the steps mentioned in the Android section to set up the Android SDK properly.
- Add API Key & API URL to Android Manifest
- Add Android Gradle Plugin
- Initialize the native Android SDK
After installing the dependencies, rebuild the app to link the native module:
npx react-native run-androidReact Native iOS Setup#
The React Native SDK depends on the native iOS SDK, so you need to follow all the steps mentioned in the iOS section to set up the iOS SDK properly.
After running pod install, rebuild the app to link the native module:
npx react-native run-iosTrack navigation#
See Navigation Monitoring for instructions on how to track navigation events.
Track http requests#
See Network Monitoring for instructions on how to track HTTP requests.
3. Verify Installation#
Launch the app with the SDK integrated and navigate through a few screens. The data is sent to the server periodically,
so it may take a few seconds to appear. Checkout the Usage section in the dashboard or navigate to the
Session Timelines tab to see the data.
🎉 Congratulations! You have successfully integrated Measure into your app!
4. Review Configuration Options#
There are several configuration options available to customize the SDK behavior. Some options can be set during SDK initialization, while others can be configured remotely from the dashboard. Review the Configuration Options section to learn more about these options and how to use them effectively.
For debug builds, it's recommended to set enableFullCollectionMode to true during initialization to ensure all data is
collected for verification purposes. In release builds, you can adjust the sampling rates and other settings as needed
to balance signal vs noise and optimize costs.
Troubleshoot#
Enable full collection mode for debug builds#
Set enableFullCollectionMode to true, which would enforce all data to be sent to the server. Do note that for
production this can lead to high costs, so it should only be used for debugging purposes.
Android
val config = MeasureConfig(
  enableFullCollectionMode = true,
)
Measure.init(context, config)
iOS
let config = BaseMeasureConfig(
    enableFullCollectionMode: true
)
Measure.initialize(with: clientInfo, config: config)
Flutter
Flutter SDK depends on the native SDKs, so you need to set enableFullCollectionMode to true in both
Android and iOS native SDK initializations.
Verify API URL and API Key#
If you are not seeing any data in the dashboard, verify that the API URL and API key are set correctly in your app.
Android
If logs show any of the following errors, make sure you have added the API URL and API key in your AndroidManifest.xml
file.
sh.measure.android.API_URL is missing in the manifest
sh.measure.android.API_KEY is missing in the manifest
iOS
Verify the API URL and API key are set correctly in the ClientInfo object when initializing the SDK.
let config = BaseMeasureConfig()
let clientInfo = ClientInfo(apiKey: "<apiKey>", apiUrl: "<apiUrl>")
Measure.initialize(with: clientInfo, config: config)
Flutter
Flutter SDK depends on the native SDKs, so verify that the API URL and API key are set correctly in both Android and iOS native SDK initializations.
React Native
React Native SDK depends on the native SDKs, so verify that the API URL and API key are set correctly in both Android and iOS native SDK initializations.
Flutter iOS — MeasureSDK must be linked statically#
Flutter adds use_frameworks! to the iOS Podfile by default, which causes CocoaPods to link all pods dynamically. MeasureSDK must be linked statically and will not work correctly with dynamic linking.
To fix this, follow the CocoaPods static linking instructions in the iOS setup section.
Connecting to Locally-hosted Server (for self-host customers)#
iOS
If you are running the measure-sh server on your machine, setting the API_URL to localhost:8080 will work on the simulator because it can access localhost. However, a physical device cannot access your computer's localhost.
To resolve this, you can use ngrok or a similar service to provide a public URL to your local server. This allows your physical device to connect to the server.
Android
For Android, if your device is on the same network as your computer, you can use your computer's local IP address (e.g.,
192.168.1.X:8080) as the API_URL. Alternatively, you can set up ADB port forwarding with the command adb reverse tcp: 8080 tcp:8080 to allow the device to connect to the server.
When using an Android emulator, you can set the API_URL to http://10.0.2.2:8080 to access the server running on your machine.
Alternatively, you can use ngrok or a similar service to provide a public URL to your local server. This allows your Android emulator or physical device to connect to the server.
Enable Logs#
Android
Enable logging during SDK initialization. All Measure SDK logs use the tag Measure.
val config = MeasureConfig(enableLogging = true)
Measure.init(context, config)
iOS
Enable logging during SDK initialization.
let config = BaseMeasureConfig(enableLogging: true)
Measure.initialize(with: clientInfo, config: config)
Flutter
Enable logging during SDK initialization.
await Measure.instance.init(() => runApp(MeasureWidget(child: MyApp())),
config: const MeasureConfig(enableLogging:true));
React Native
Enable logging during SDK initialization.
const config = new MeasureConfig({ enableLogging: true });
await Measure.init({ config });
Connecting to a Self-hosted Server#
If you are hosting the server in cloud. Make sure the API URL is set to the public URL of your server.
For example: set the API URL to https://measure-api.<your-domain>.com, replacing
Contact Support#
If none of the above steps resolve the issue, feel free to reach out to us on Discord for further assistance.
Enable Diagnostic Mode#
If you're experiencing issues with the SDK and need to share detailed logs with us, enable diagnostic mode. This writes all internal SDK logs to files on disk which can then be pulled from the device and shared when reporting a bug.
[!NOTE] These files only contain Measure SDK logs, not your app's logs.
Step 1: Enable diagnostic mode
Android
Enable diagnostic mode during SDK initialization.
val config = MeasureConfig(enableDiagnosticMode = true)
Measure.init(context, config)
iOS
Enable diagnostic mode during SDK initialization. iOS provides an additional option called enableDiagnosticModeGesture. When this flag is enabled, you can use double finger double tap gesture to open share sheet and send logs immediately.
let config = BaseMeasureConfig(enableDiagnosticMode: true, enableDiagnosticModeGesture: true)
Measure.initialize(with: clientInfo, config: config)
Flutter
Enable diagnostic mode during SDK initialization.
await Measure.instance.init(
  () => runApp(MeasureWidget(child: MyApp())),
  config: const MeasureConfig(enableDiagnosticMode: true),
);
On iOS, the enableDiagnosticModeGesture flag is set on the native BaseMeasureConfig in your AppDelegate (see the iOS section above), not on the Dart MeasureConfig.
React Native
Enable diagnostic mode during SDK initialization.
const config = new MeasureConfig({ enableDiagnosticMode: true });
await Measure.init({ config });
On iOS, the enableDiagnosticModeGesture flag is set on the native BaseMeasureConfig in your AppDelegate (see the iOS section above), not on the Dart MeasureConfig.
Step 2: Reproduce the issue
Run the app and reproduce the issue you're facing. The SDK will write logs to files in the app's internal storage.
Step 3: Pull the log files
Android
Use adb to retrieve the log files from the device:
# List all diagnostic log files
adb shell run-as <your.package.name> ls files/measure/sdk_debug_logs/

# Pull all log files as a tar.gz archive
adb shell "run-as <your.package.name> tar czf - files/measure/sdk_debug_logs/" > /tmp/sdk_debug_logs.tar.gz
iOS
iOS provides an option called enableDiagnosticModeGesture. When this flag is enabled, you can use double finger double tap gesture to open share sheet and send logs immediately.
let config = BaseMeasureConfig(enableDiagnosticMode: true, enableDiagnosticModeGesture: true)
Measure.initialize(with: clientInfo, config: config)
Step 4: Share the files
Share the pulled log files on Discord or send them to us via email for us to investigate.
Step 5: Disable diagnostic mode
Once you've collected the logs, disable diagnostic mode by removing the enableDiagnosticMode flag
or setting it to false. You can also delete the log files from the device:
Android
adb shell run-as <your.package.name> rm -rf files/measure/sdk_debug_logs/